In today’s era of internet connectivity, making voice calls over the Internet (VoIP) is becoming a popular trend, especially on mobile platforms like iOS. With the support of CallKit and PushKit, VoIP applications not only save battery life but also optimize performance when running in the background. This article will guide you how to integrate VoIP and CallKit into a React Native application on iOS, providing a seamless calling experience for users.
What is VoIP?
VoIP (Voice over Internet Protocol) is a protocol that transmits voice over an internet connection instead of using traditional mobile services. Since iOS 8, VoIP applications need to maintain a constant connection with the server to receive calls. However, keeping this connection active in the background can drain battery and lead to issues like app crashes or users manually closing the app.
To address these problems, Apple introduced PushKit, which optimizes performance and improves battery life. PushKit allows high-priority push notifications with larger payloads, ensuring that VoIP apps can receive calls even when the app isn’t running or is in the background.
Why PushKit?
For VoIP applications, waking the app when a call comes in is crucial. Traditional APN (Apple Push Notification) cannot wake up the app if it has been closed. PushKit solves this by delivering high-priority VoIP push notifications, allowing the app to always be ready to handle calls.
Benefits of PushKit:
- Silent notifications: Notifications are not shown to the user, avoiding interruptions with badges, alerts, or sounds.
- High priority: Apple ensures that VoIP notifications are delivered with top priority.
- Larger payload: VoIP notifications can include data up to 5 KB.
- Energy-efficient: Devices only wake when a VoIP command is received.
- Automatic launch: The app will automatically restart if it was closed when the notification was received.
- Processing time: The app gets time to handle the notification even while in the background.
How to integrate VoIP and CallKit
Create a Certificate
- Step 1: Create an Apple Certificate
- Go to the Apple Developer portal -> select Certificates -> create a new one.
- Download and open it in Keychain Access, then export it as a
.pemfile.
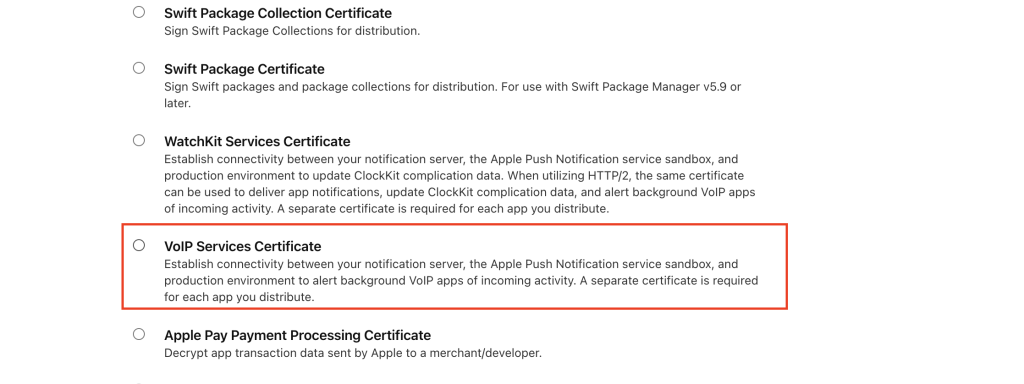
- Step 2: Create an Apple VoIP Certificate
- Go to Apple Developer -> select Certificates -> create a VoIP Certificate.
- Download and open in Keychain Access, then export it as a
.p12file.

- Step 3: Run Locally
- Create a new folder, open a terminal, and run the following command:
openssl pkcs12 -in YOUR_CERTIFICATES.p12 -out VOIP.pem -nodes -clcerts
Install the Libraries
- Install CallKit library:
Run the command:bashCopy codeyarn add react-native-callkeepReference link: react-native-callkeep - Install VoIP Push Notification library:
Run the command:bashCopy codeyarn add react-native-voip-push-notificationReference link: react-native-voip-push-notification
Enable Voice over IP
- Open Xcode -> select Capabilities -> enable Background Modes and check the following options:
- “Voice over IP”
- “Audio, Airplay, and Picture in Picture”
- “Background fetch”
- “Remote notification”
Example Configuration for VoIP and CallKit
- VoIP Push Notifications Configuration:
javascriptCopy codeimport VoipPushNotification from 'react-native-voip-push-notification';

let token = '';
VoipPushNotification.requestPermissions();
VoipPushNotification.registerVoipToken();

VoipPushNotification.addEventListener('register', (t) => {
  token = t; // Send token to the APN server
});
- CallKit Configuration:
javascriptCopy codeimport RNCallKeep from 'react-native-callkeep';

const options = {
  ios: {
    appName: 'ABC',
    supportsVideo: true,
  },
  android: {
    alertTitle: 'Permissions required',
    alertDescription: 'This application needs to access your phone accounts',
  },
};

RNCallKeep.setup(options);

RNCallKeep.addEventListener('answerCall', ({ callUUID }) => {
  // Handle call answer event
});
Testing the Notification
To send a notification from Apple, use the following command in the terminal:
codecurl -v -d '{"aps":{"caller":"Caller Name"}}' --http2 --cert VOIP.pem:password https://api.development.push.apple.com/3/device/voip_device_token
Conclusion
This article has introduced how to setting VoIP and CallKit in React Native, with a special focus on integrating PushKit to optimize user experience. Using VoIP helps save energy and increases efficiency in handling calls on iOS.